recipe

Simple Stir Fry (recipe)

This time of year, we all start to look for comfort food.  The days when I crave salads and smoothies lately are few and far between.  The only downside to this is that most people don’t have the time, knowledge, or motivation to think up healthy ways to make comfort food.  Most of the time, we automatically grab for the baked mac and cheese or the extra cheesy pasta to keep us warm while the snow falls outside.

Oftentimes the only thing you need to make a healthy, hearty recipe is a “star”, or something to center your dish around. It’s hard to see how a dish can come together without bread or cheese, two things that we often mindlessly add to a meal to make it “complete.”

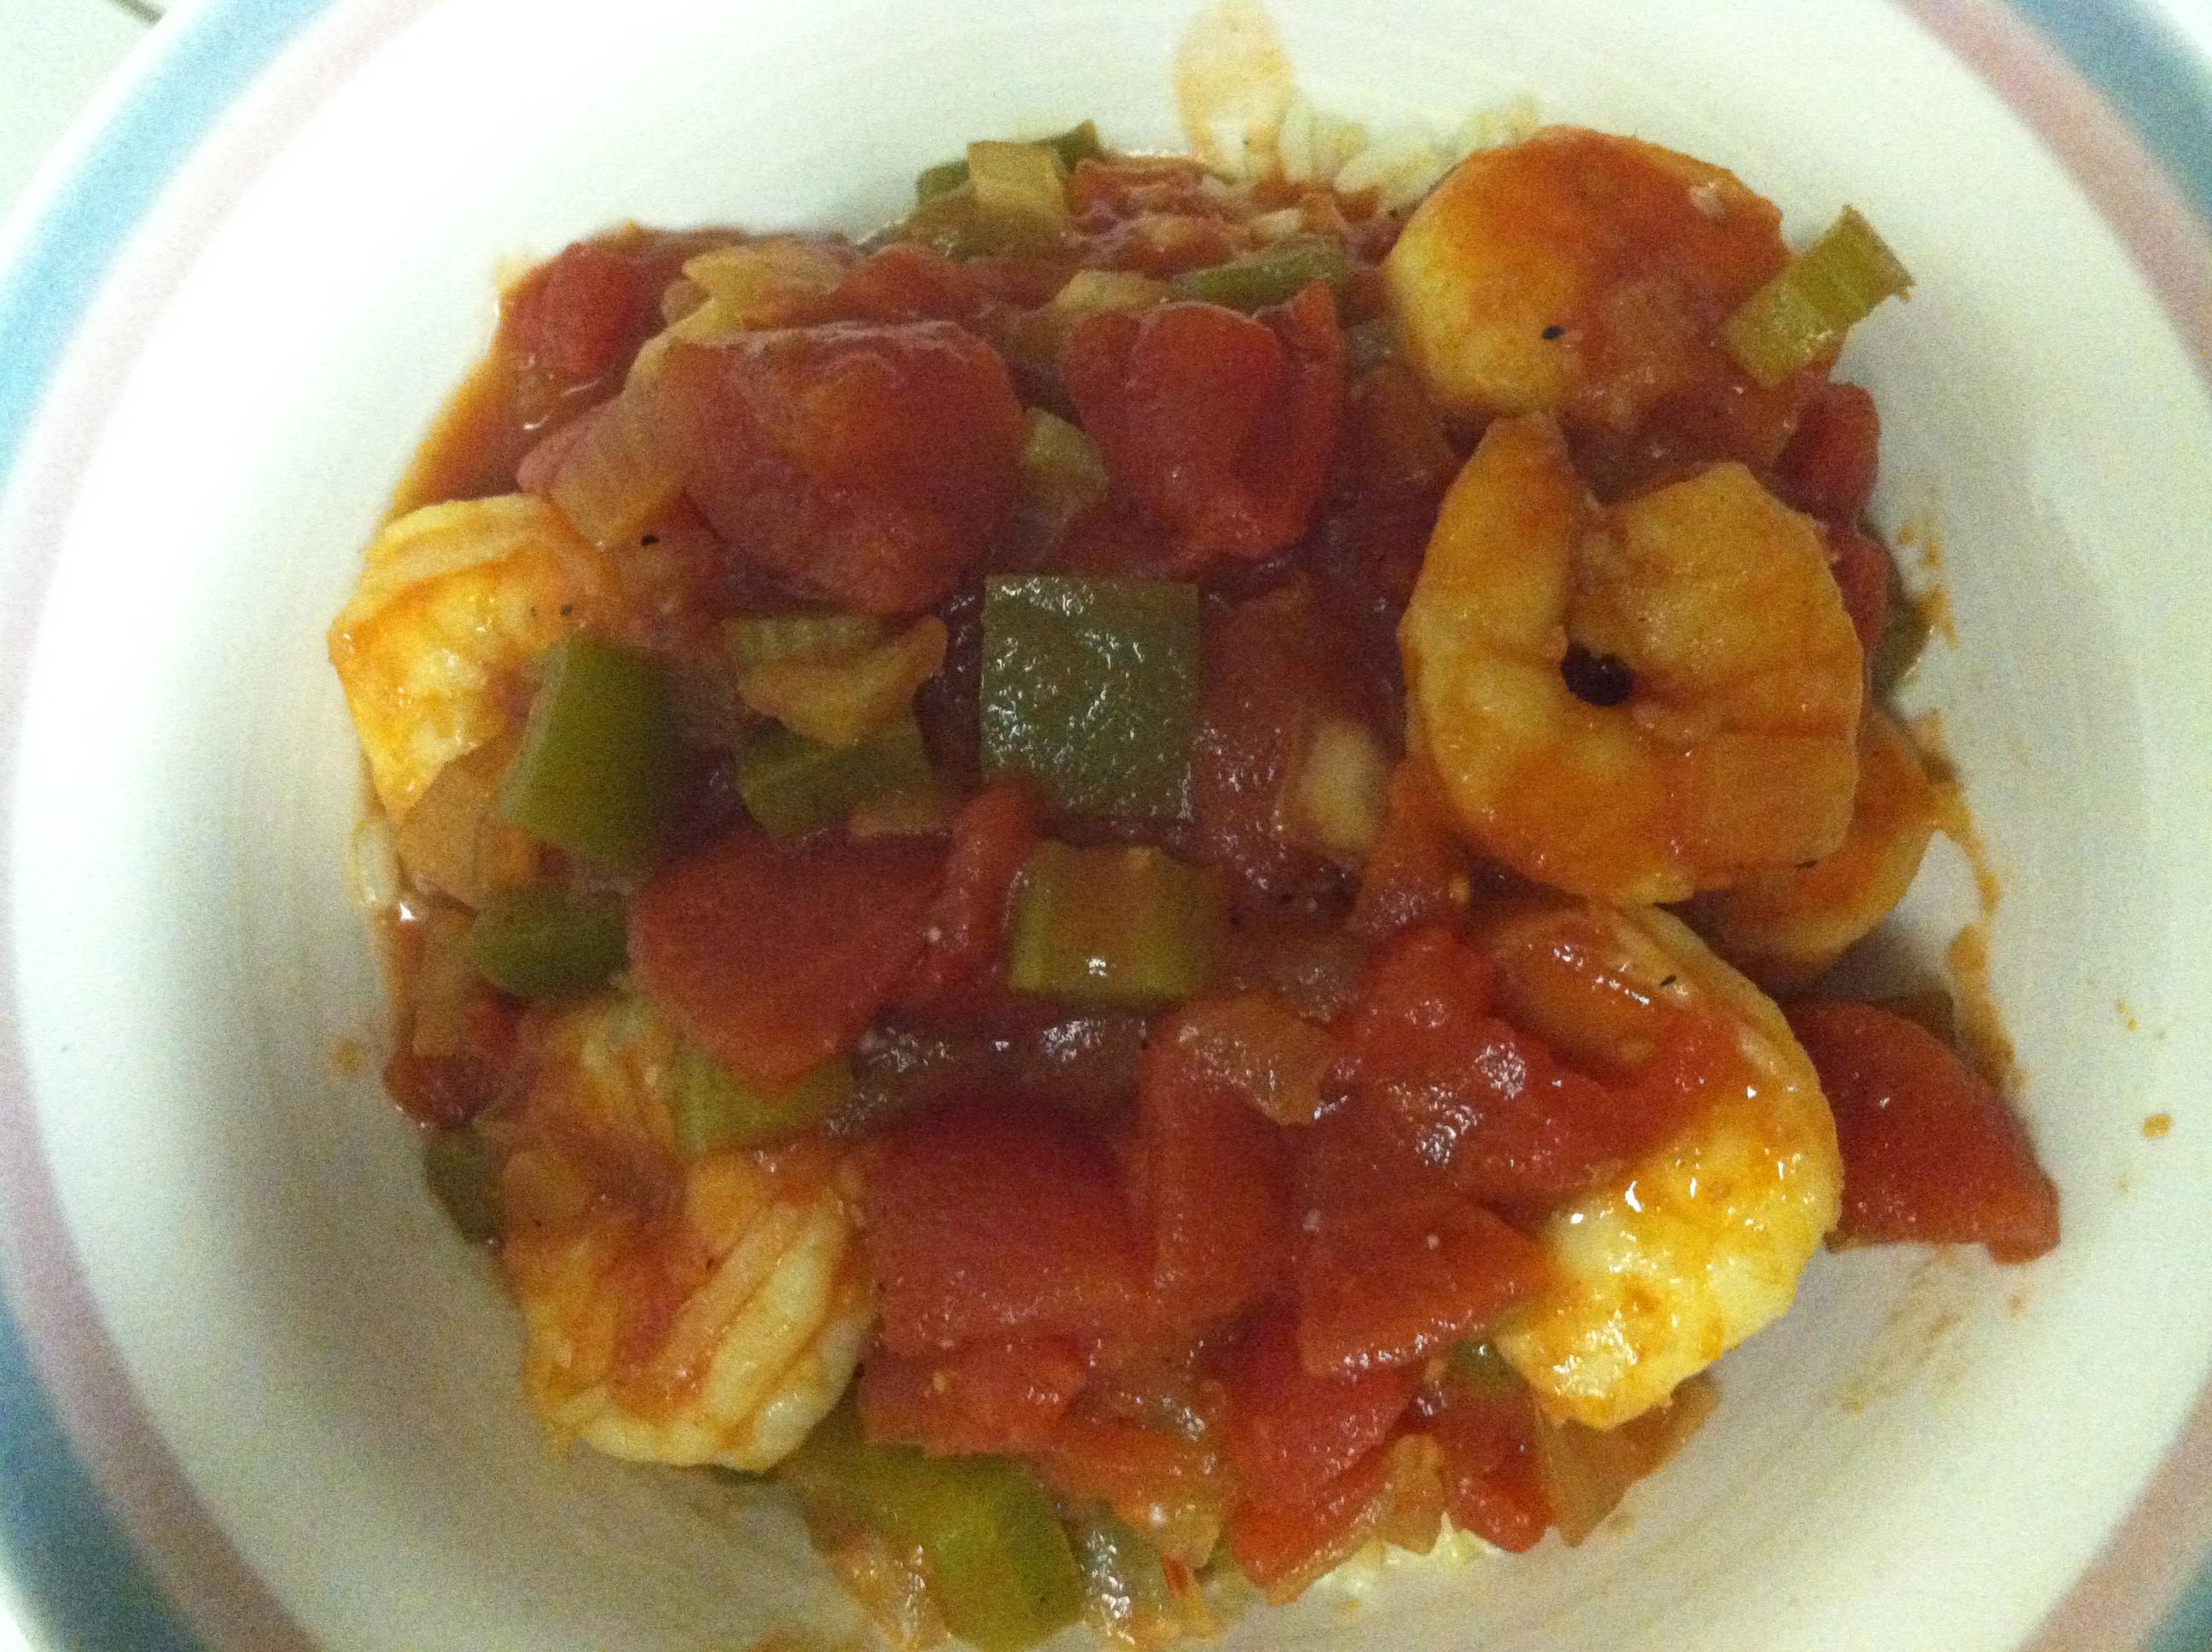
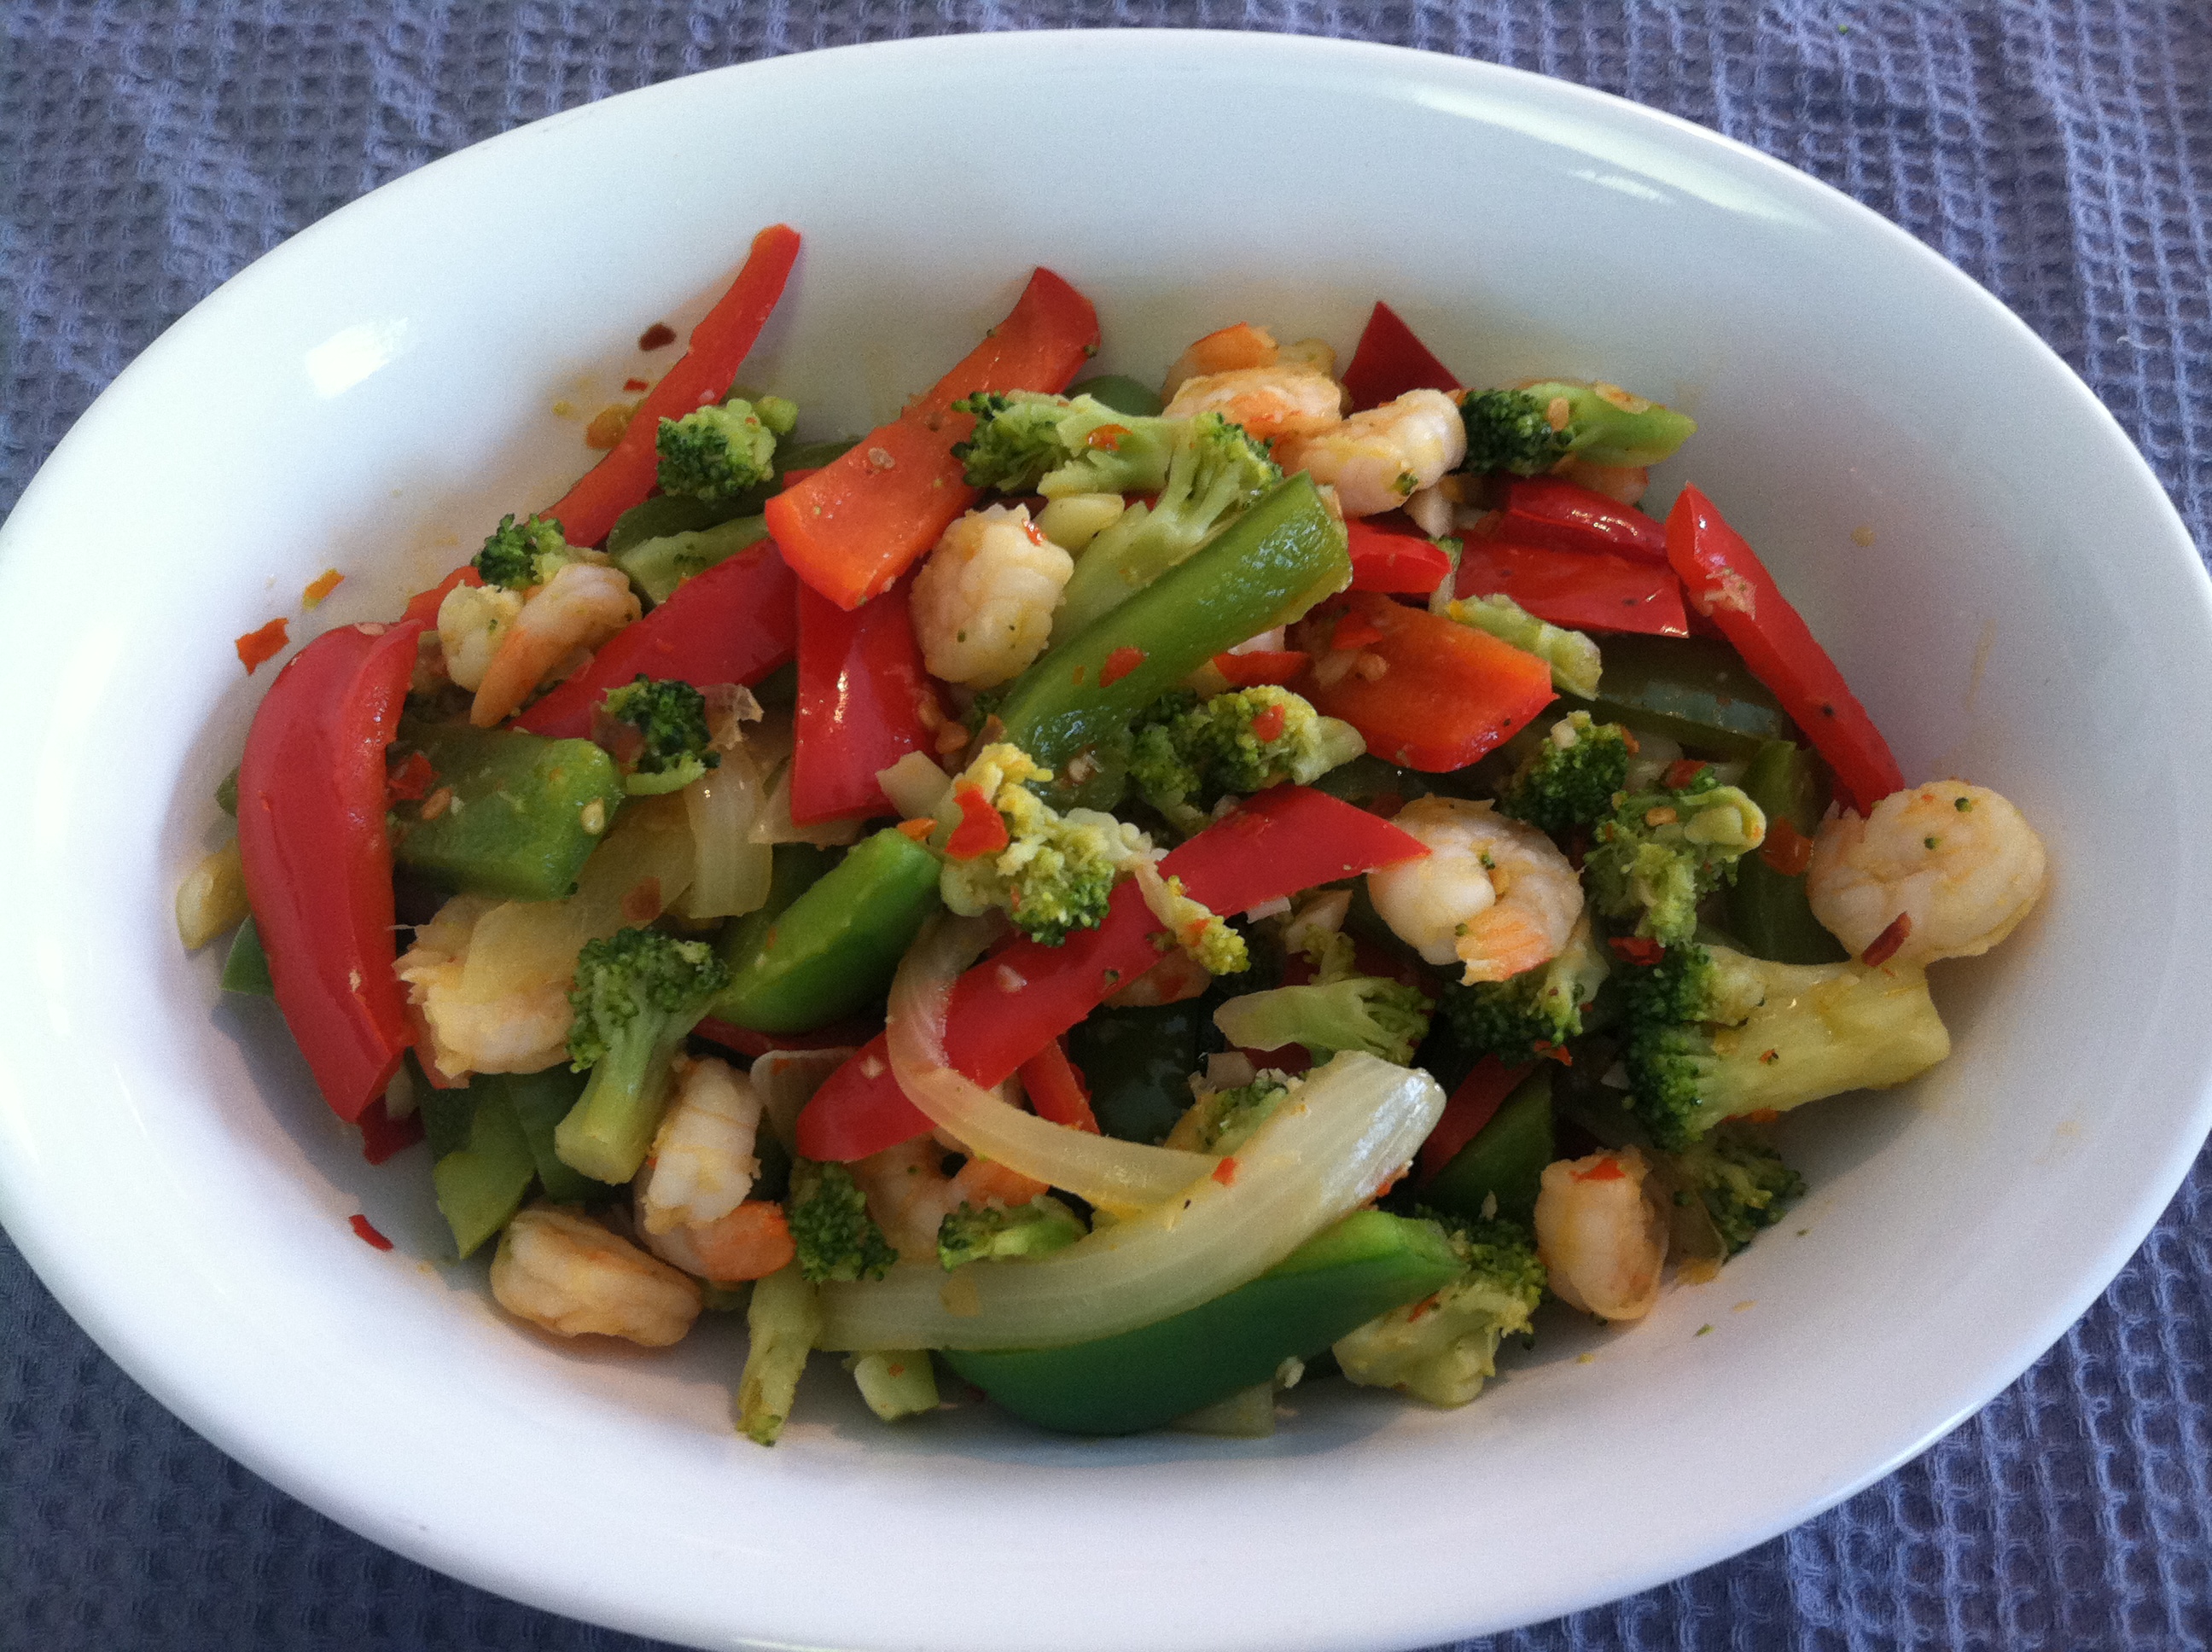
Today I’m going to share with you a really simple recipe for stir fry.  You can add whatever protein you like (lean beef, chicken, shrimp, egg, etc.) to bulk up this veggie-based dish and you’ll have a complete, hearty meal in no time.  You probably have all the ingredients at home already.  All you may need to go out and buy is the star of the show: sweet chili sauce! My roommate and I used to make this all the time in college (shoutout to Christina!) and it was eaten many a time watching E! News after classes throughout winter.

Image

Veggie Stir Fry (+ protein of choice)

Ingredients

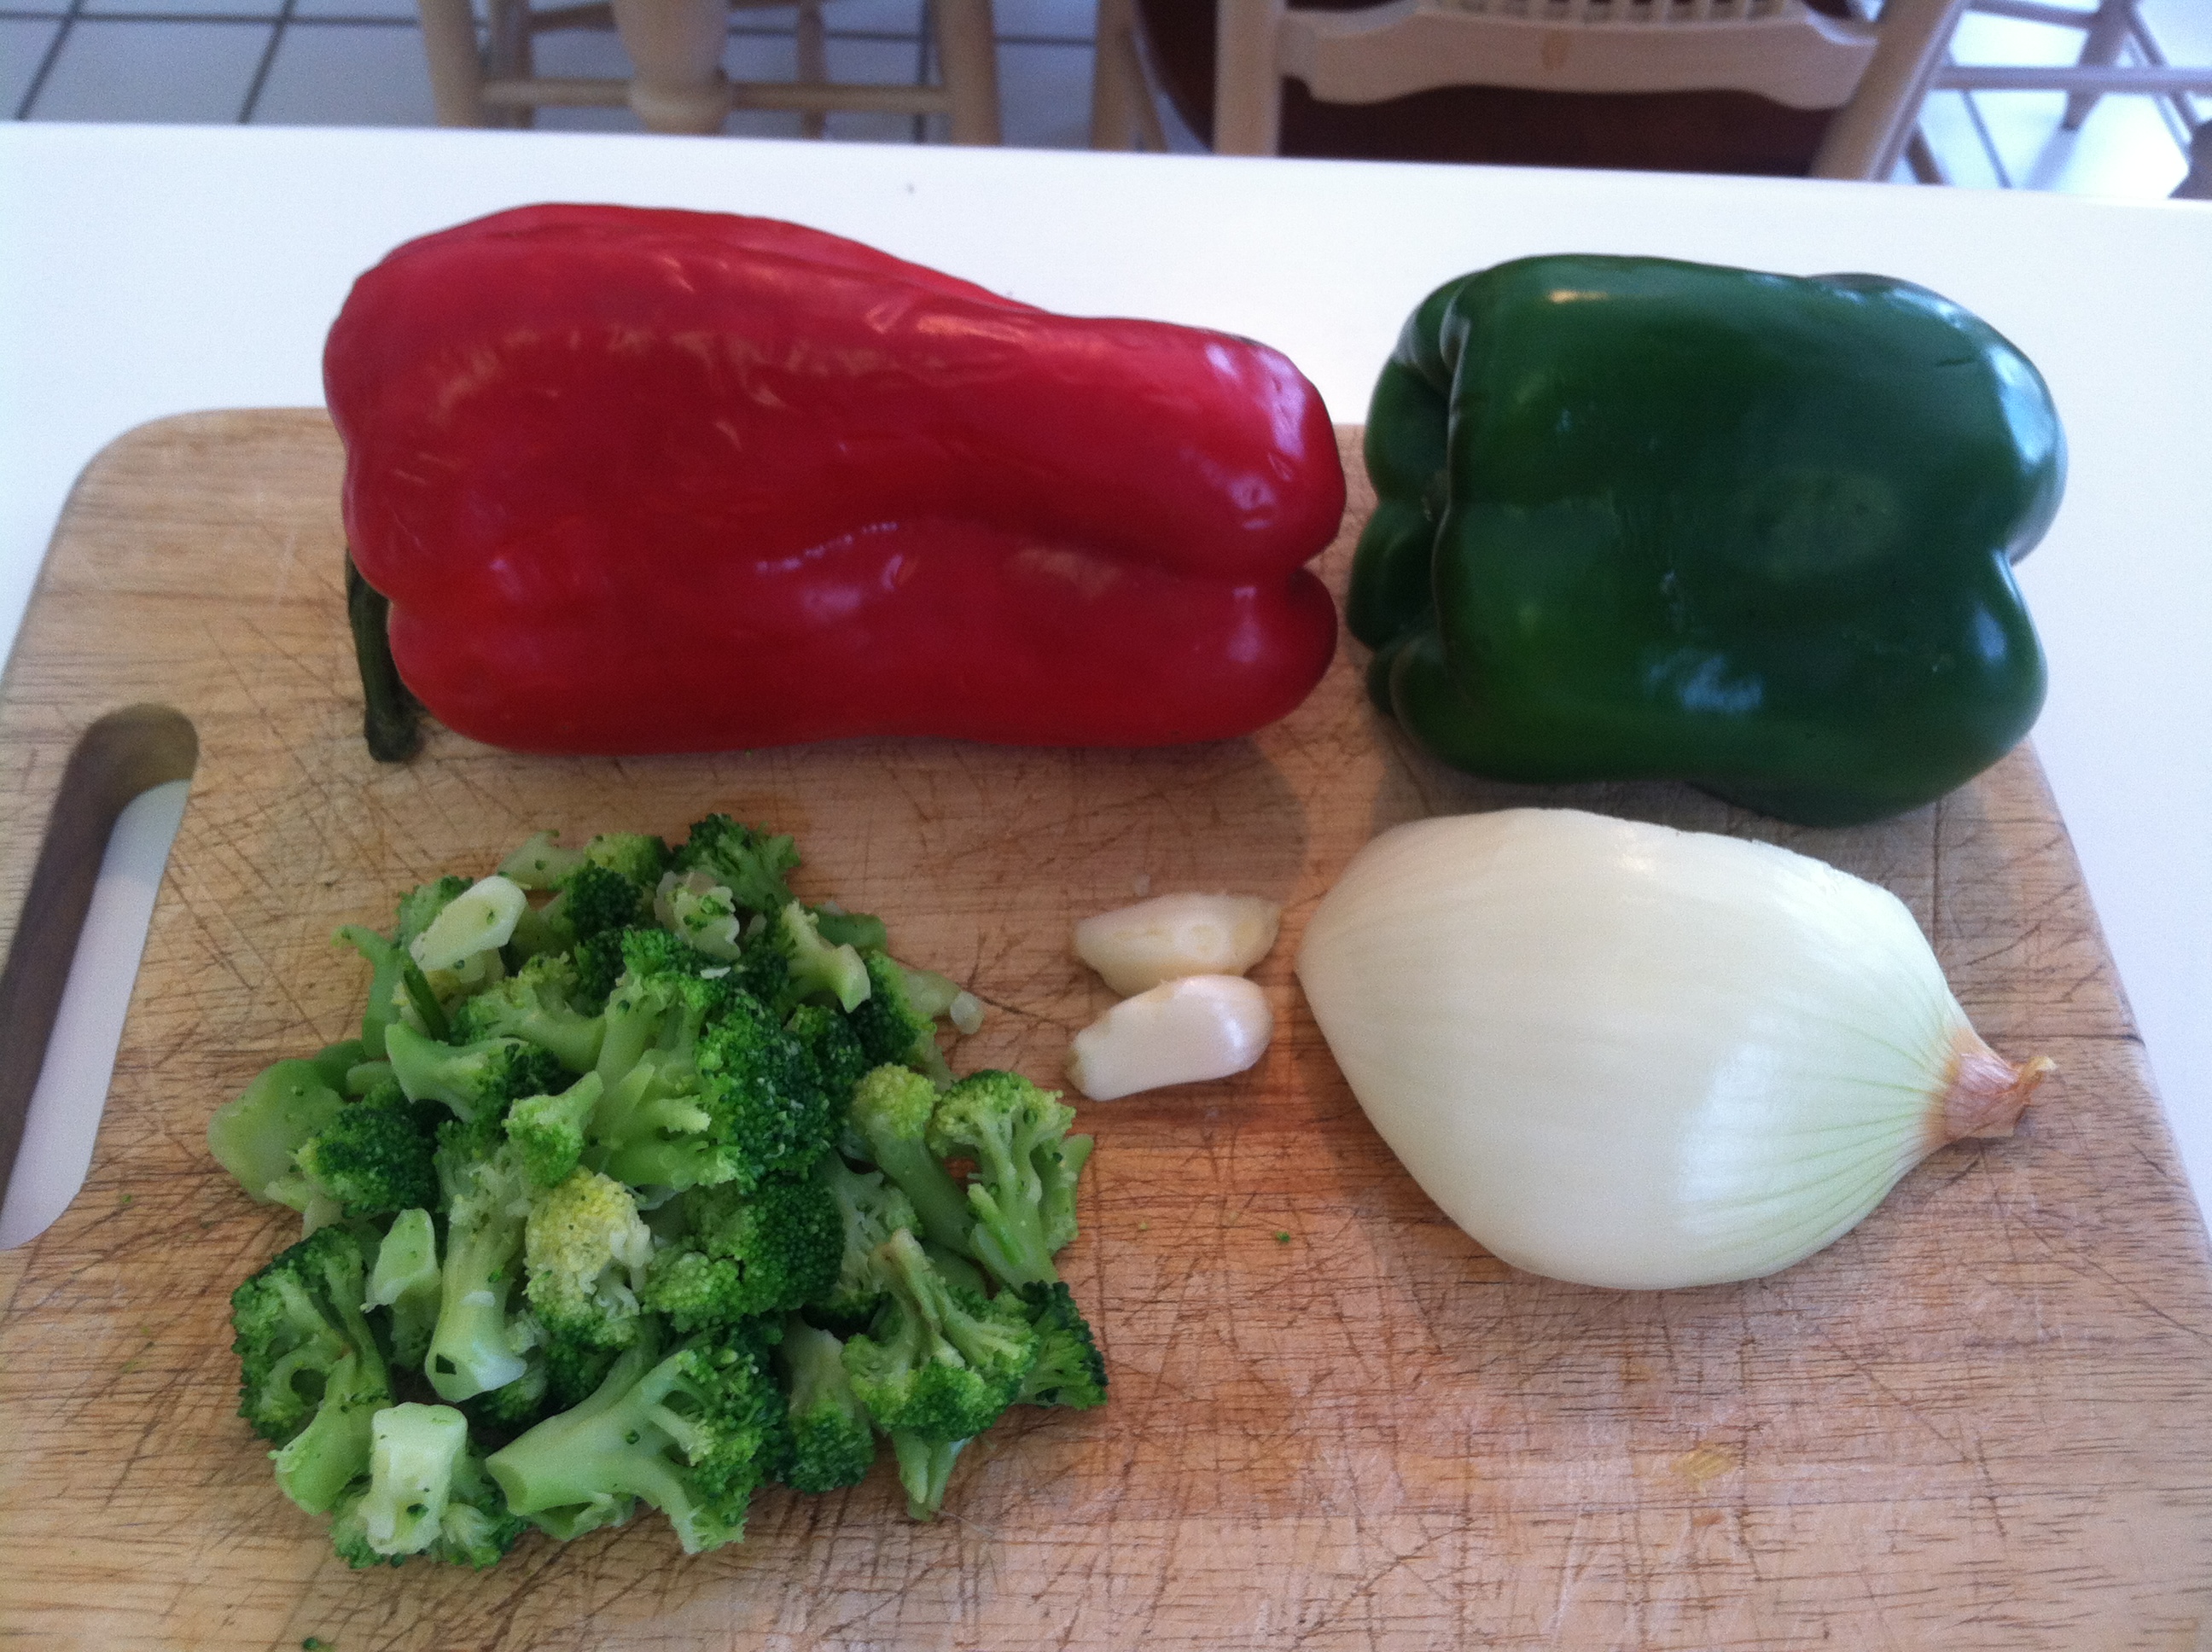
  • 1 red bell pepper, sliced
  • 1 green bell pepper, sliced
  • 1/2 a yellow onion, sliced
  • 2 cloves of garlic
  • 1 cup steamed broccoli (just buy the steam and go bag from the grocery store)
  • Sweet chili sauce (Mae ploy brand is very common)
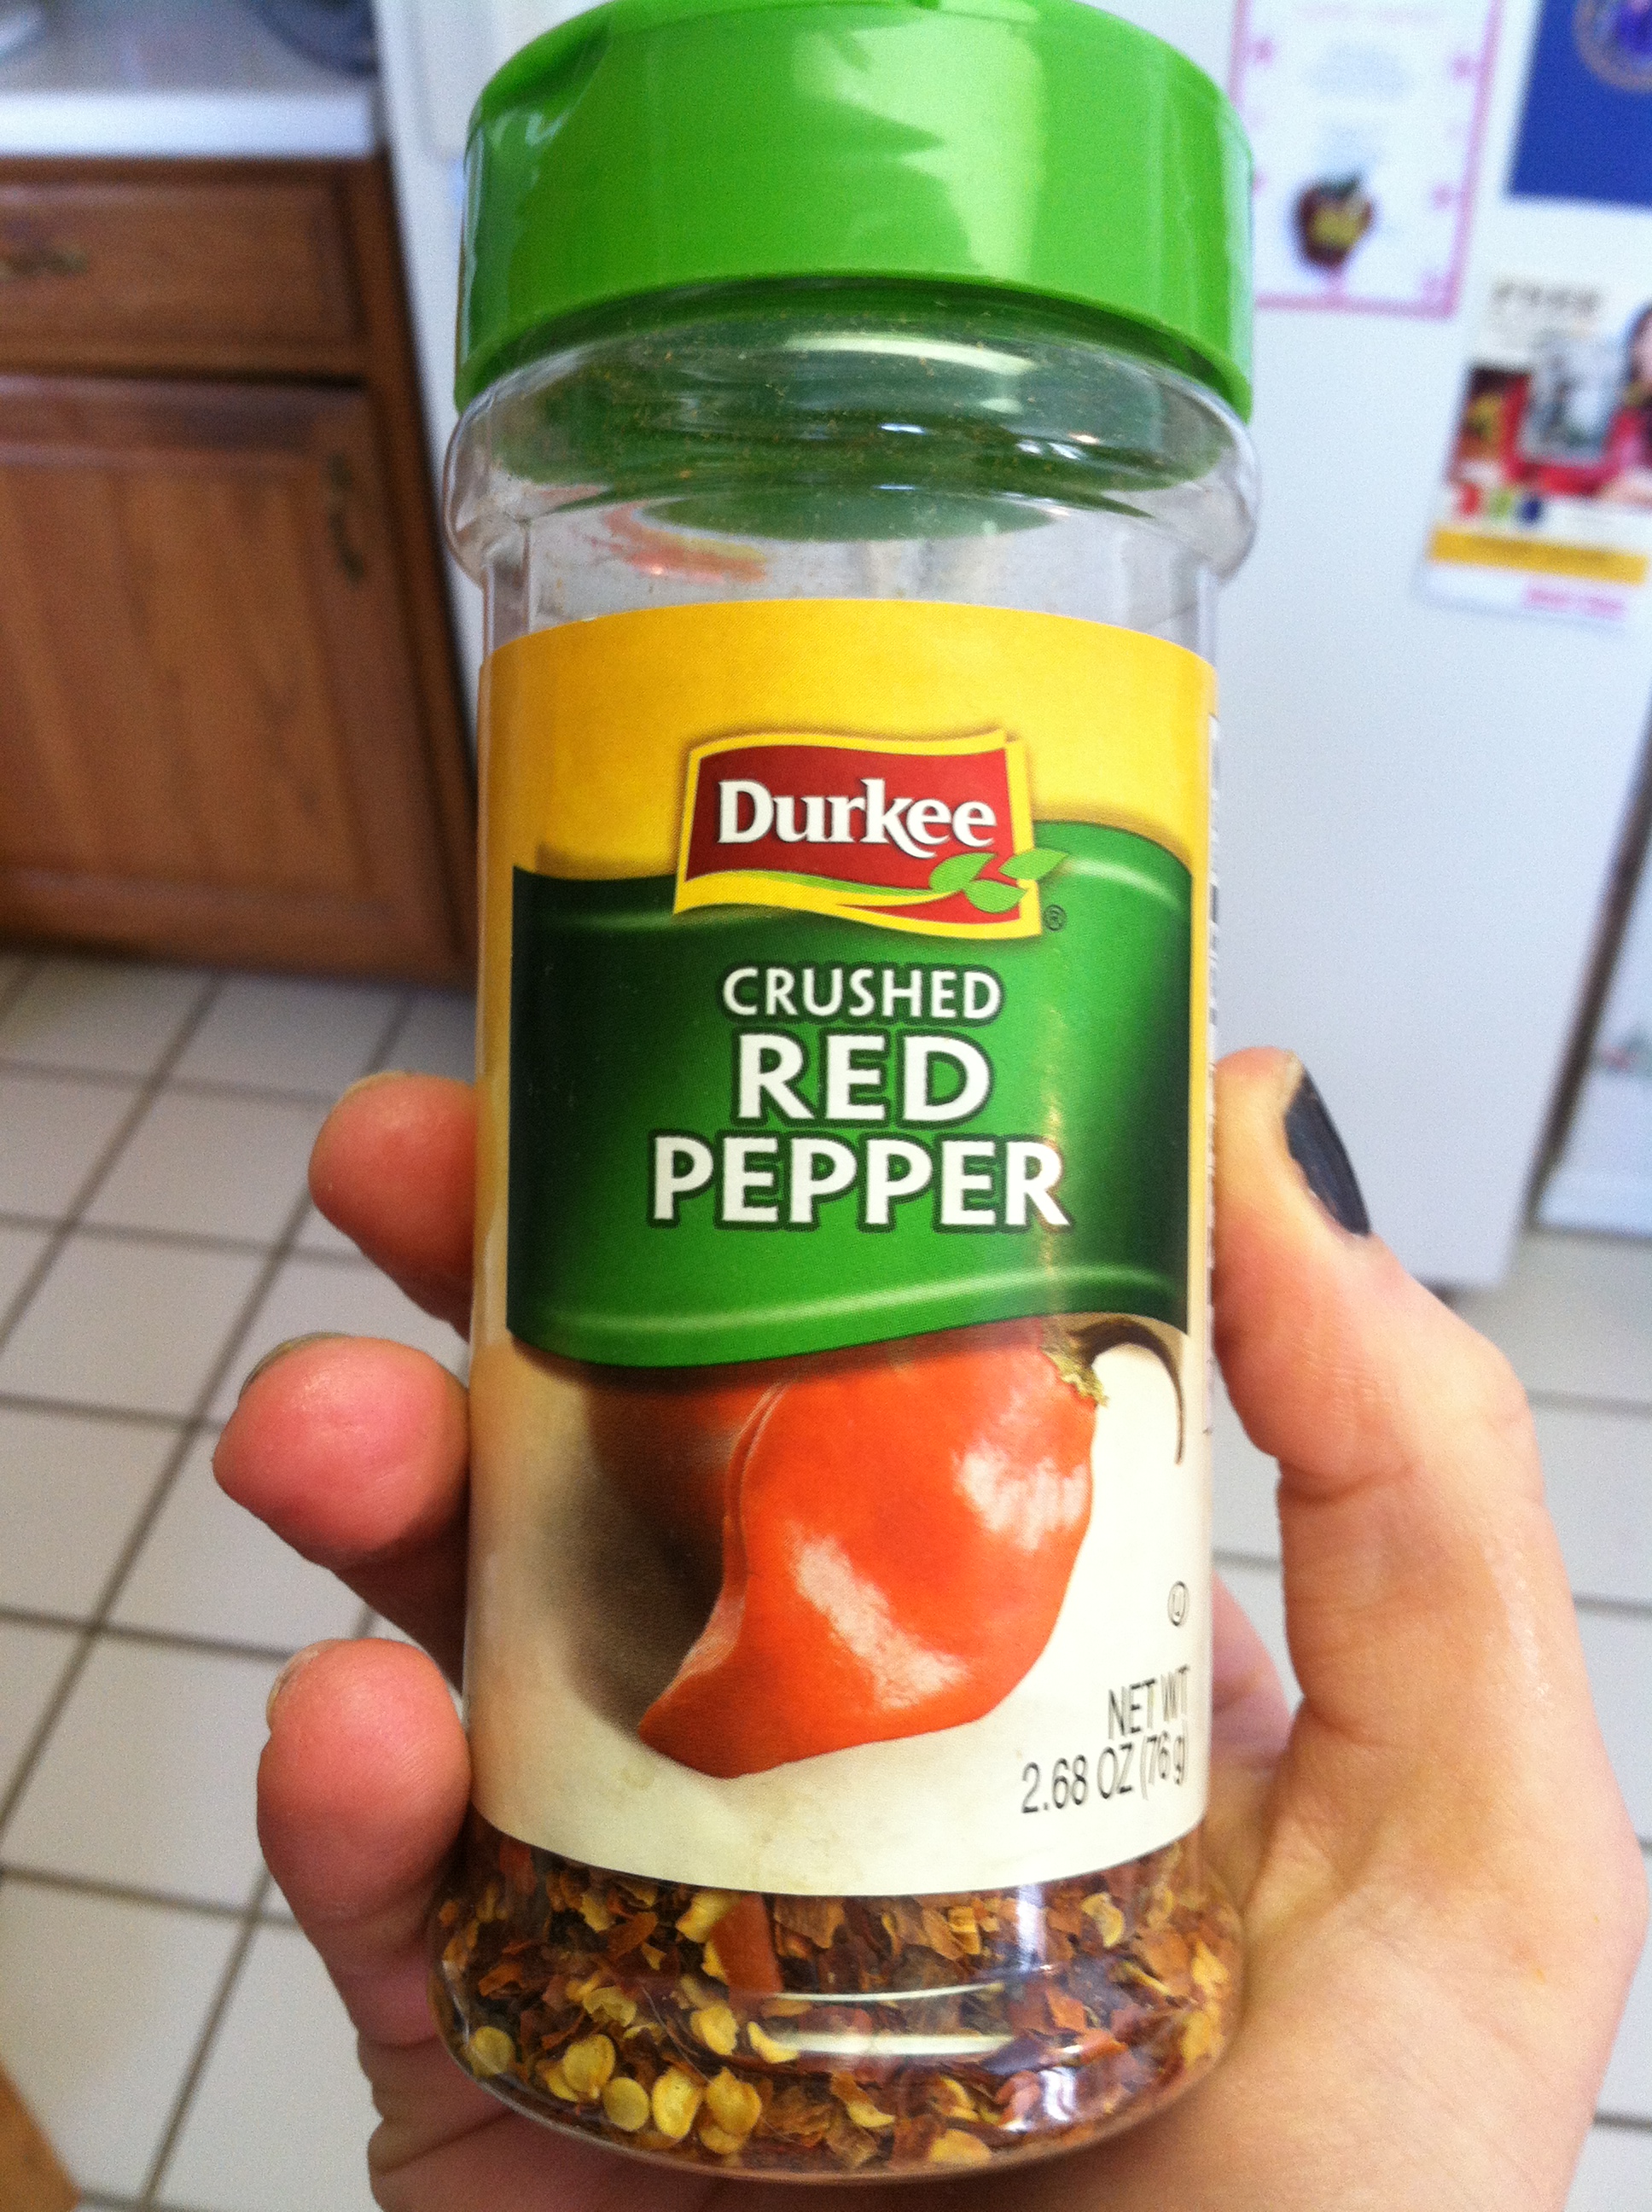
  • Red pepper flakes
  • Pre-cooked shrimp, chicken, beef, etc.

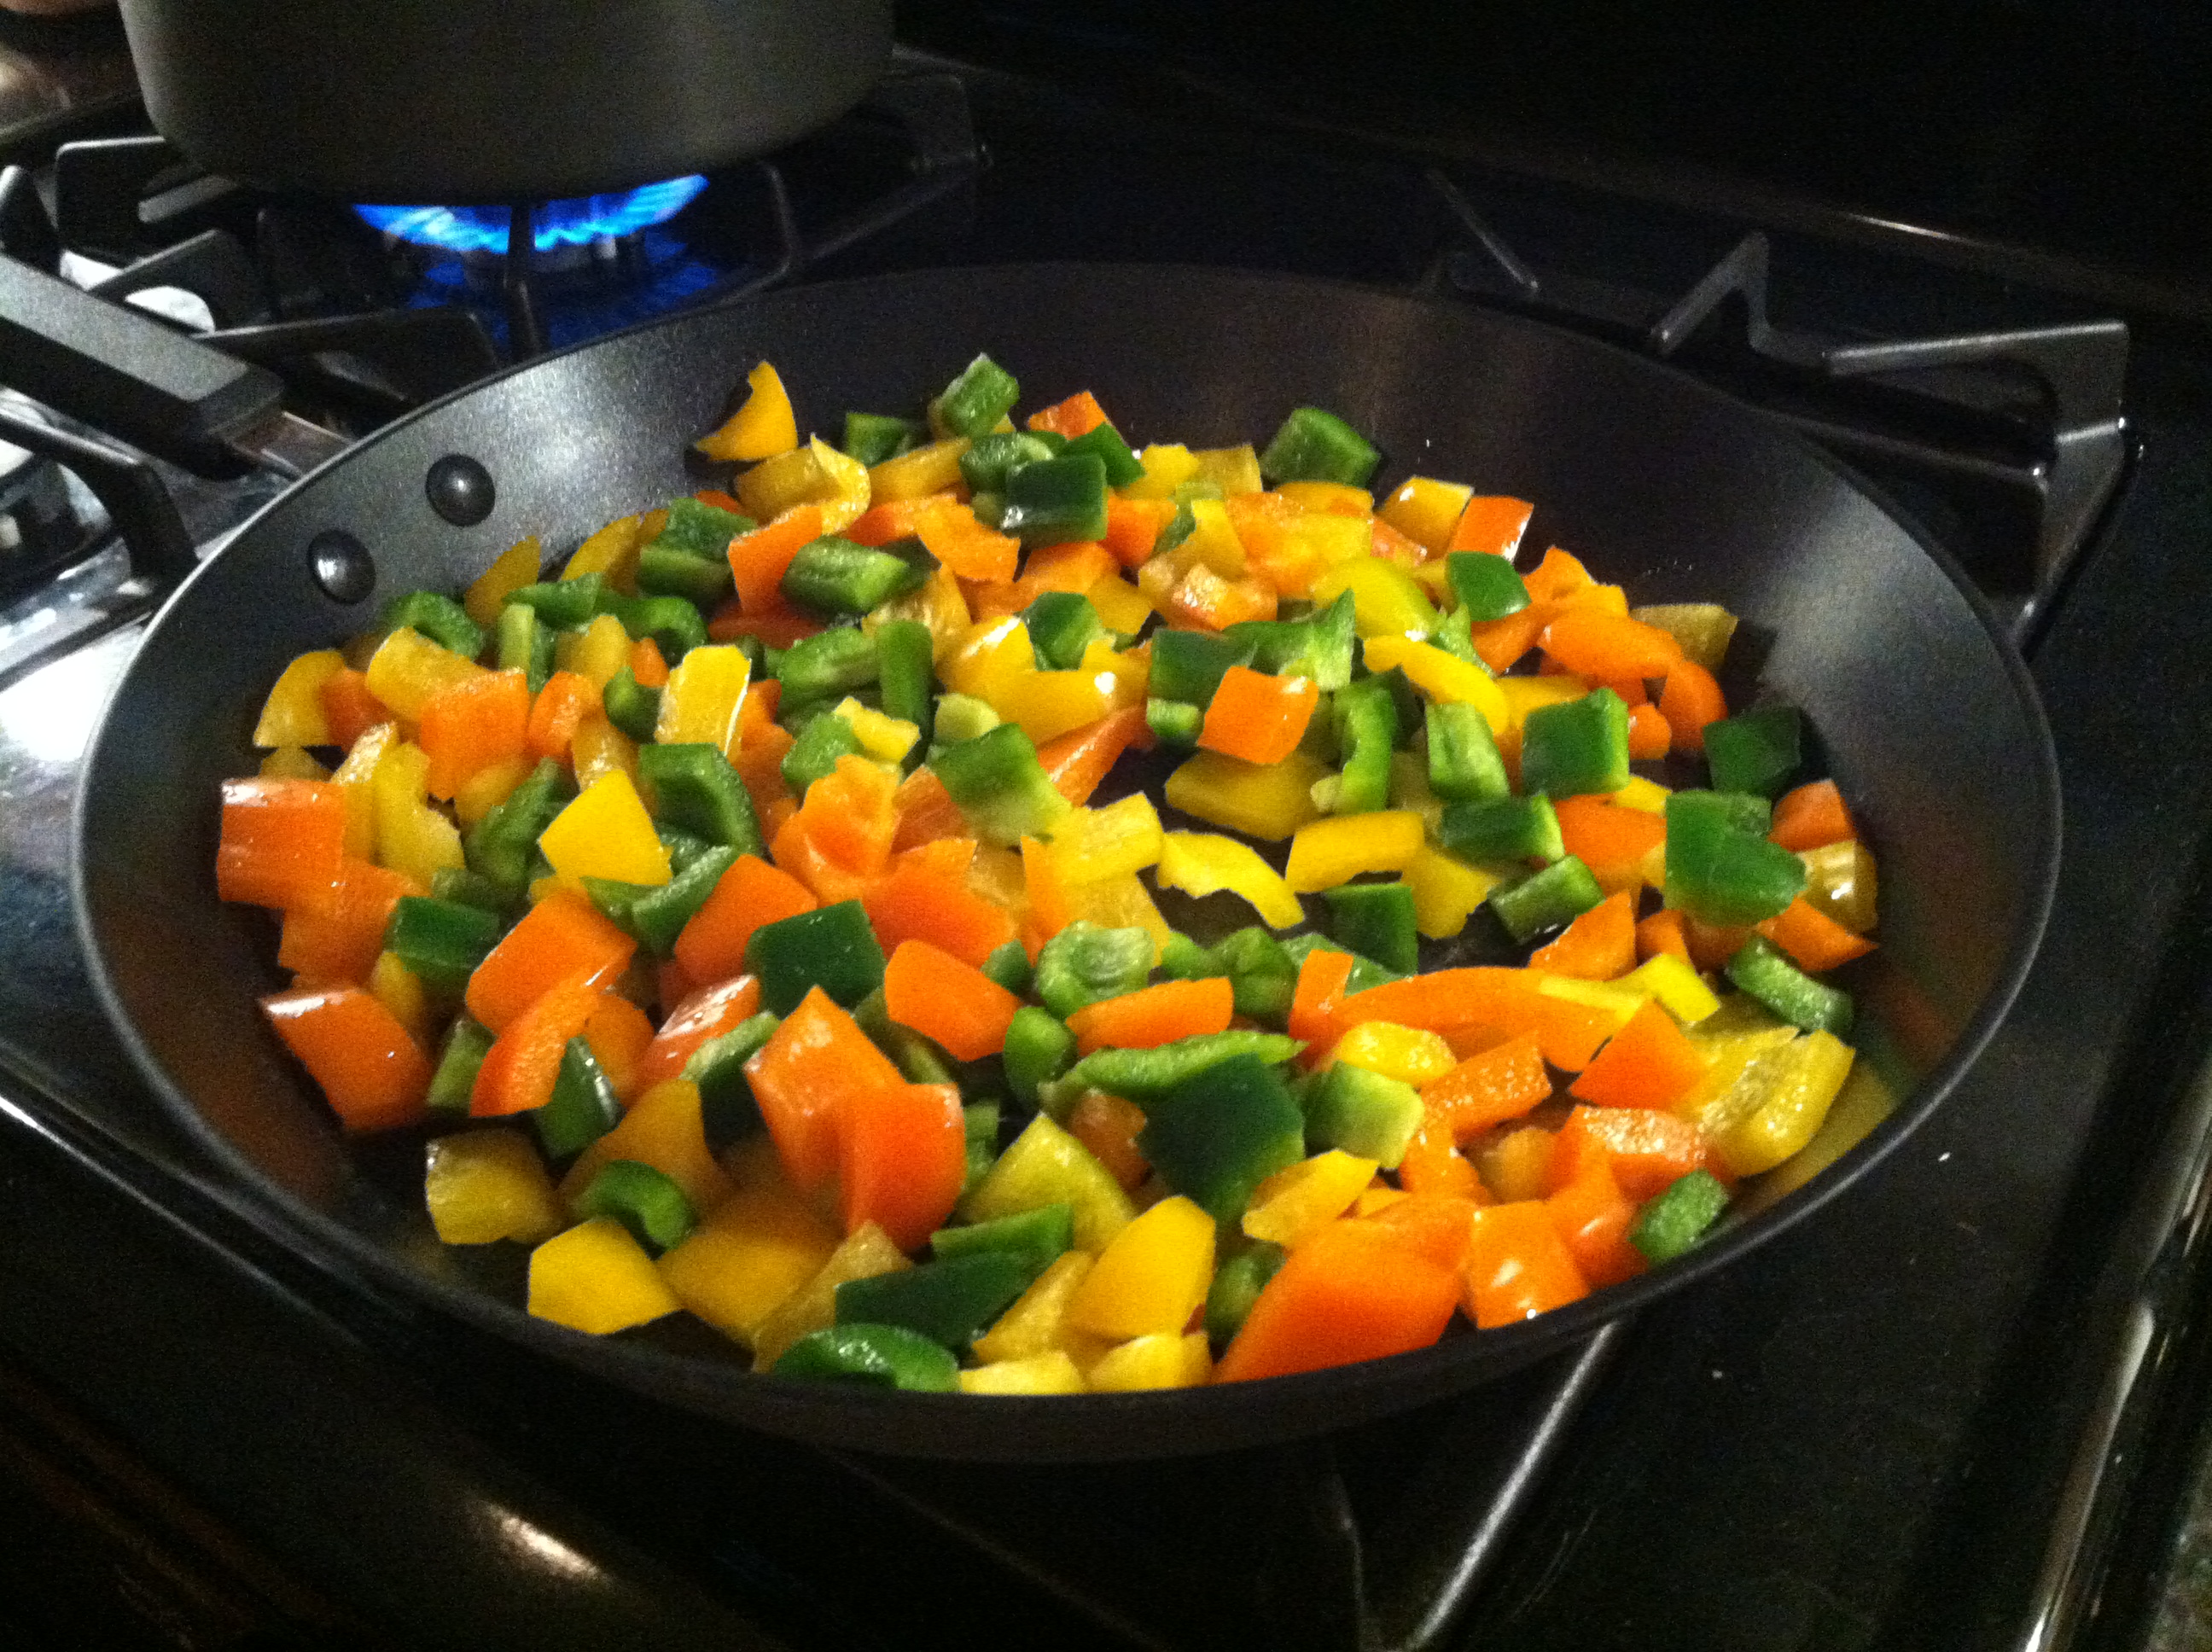
First wash and lay out your veggies on a cutting board.  Cut up the peppers and onions into slices and mince the garlic.

ImageImage

Grab a sautee pan and sprinkle it with olive oil (about 2 tablespoons or so).  Put heat on medium-low and add your minced garlic. “Low and slow is the best way to cook veggies so lean more towards low heat.”

Image

Once you can smell the garlic cooking, add your pepper and onion mixture. Sautee the veggies for about 15 minutes, or until they’re cooked.  The perfect cooked veggie still has crunch to it but is soft to the touch.

Image

As the veggies are cooking, add your sweet chili sauce.  It really doesn’t matter when you add the sauce since I always pour some on top of my finished veggies anyway, but I think it’s nice to cook the veggies with the sauce too to give them a deeper flavor. Whenever you choose to add your sweet chili sauce, also put in a few shakes of red pepper flakes.  I always add a lot because I love heat in dishes, but add it carefully (start with two shakes). You can always add more later.

ImageImage

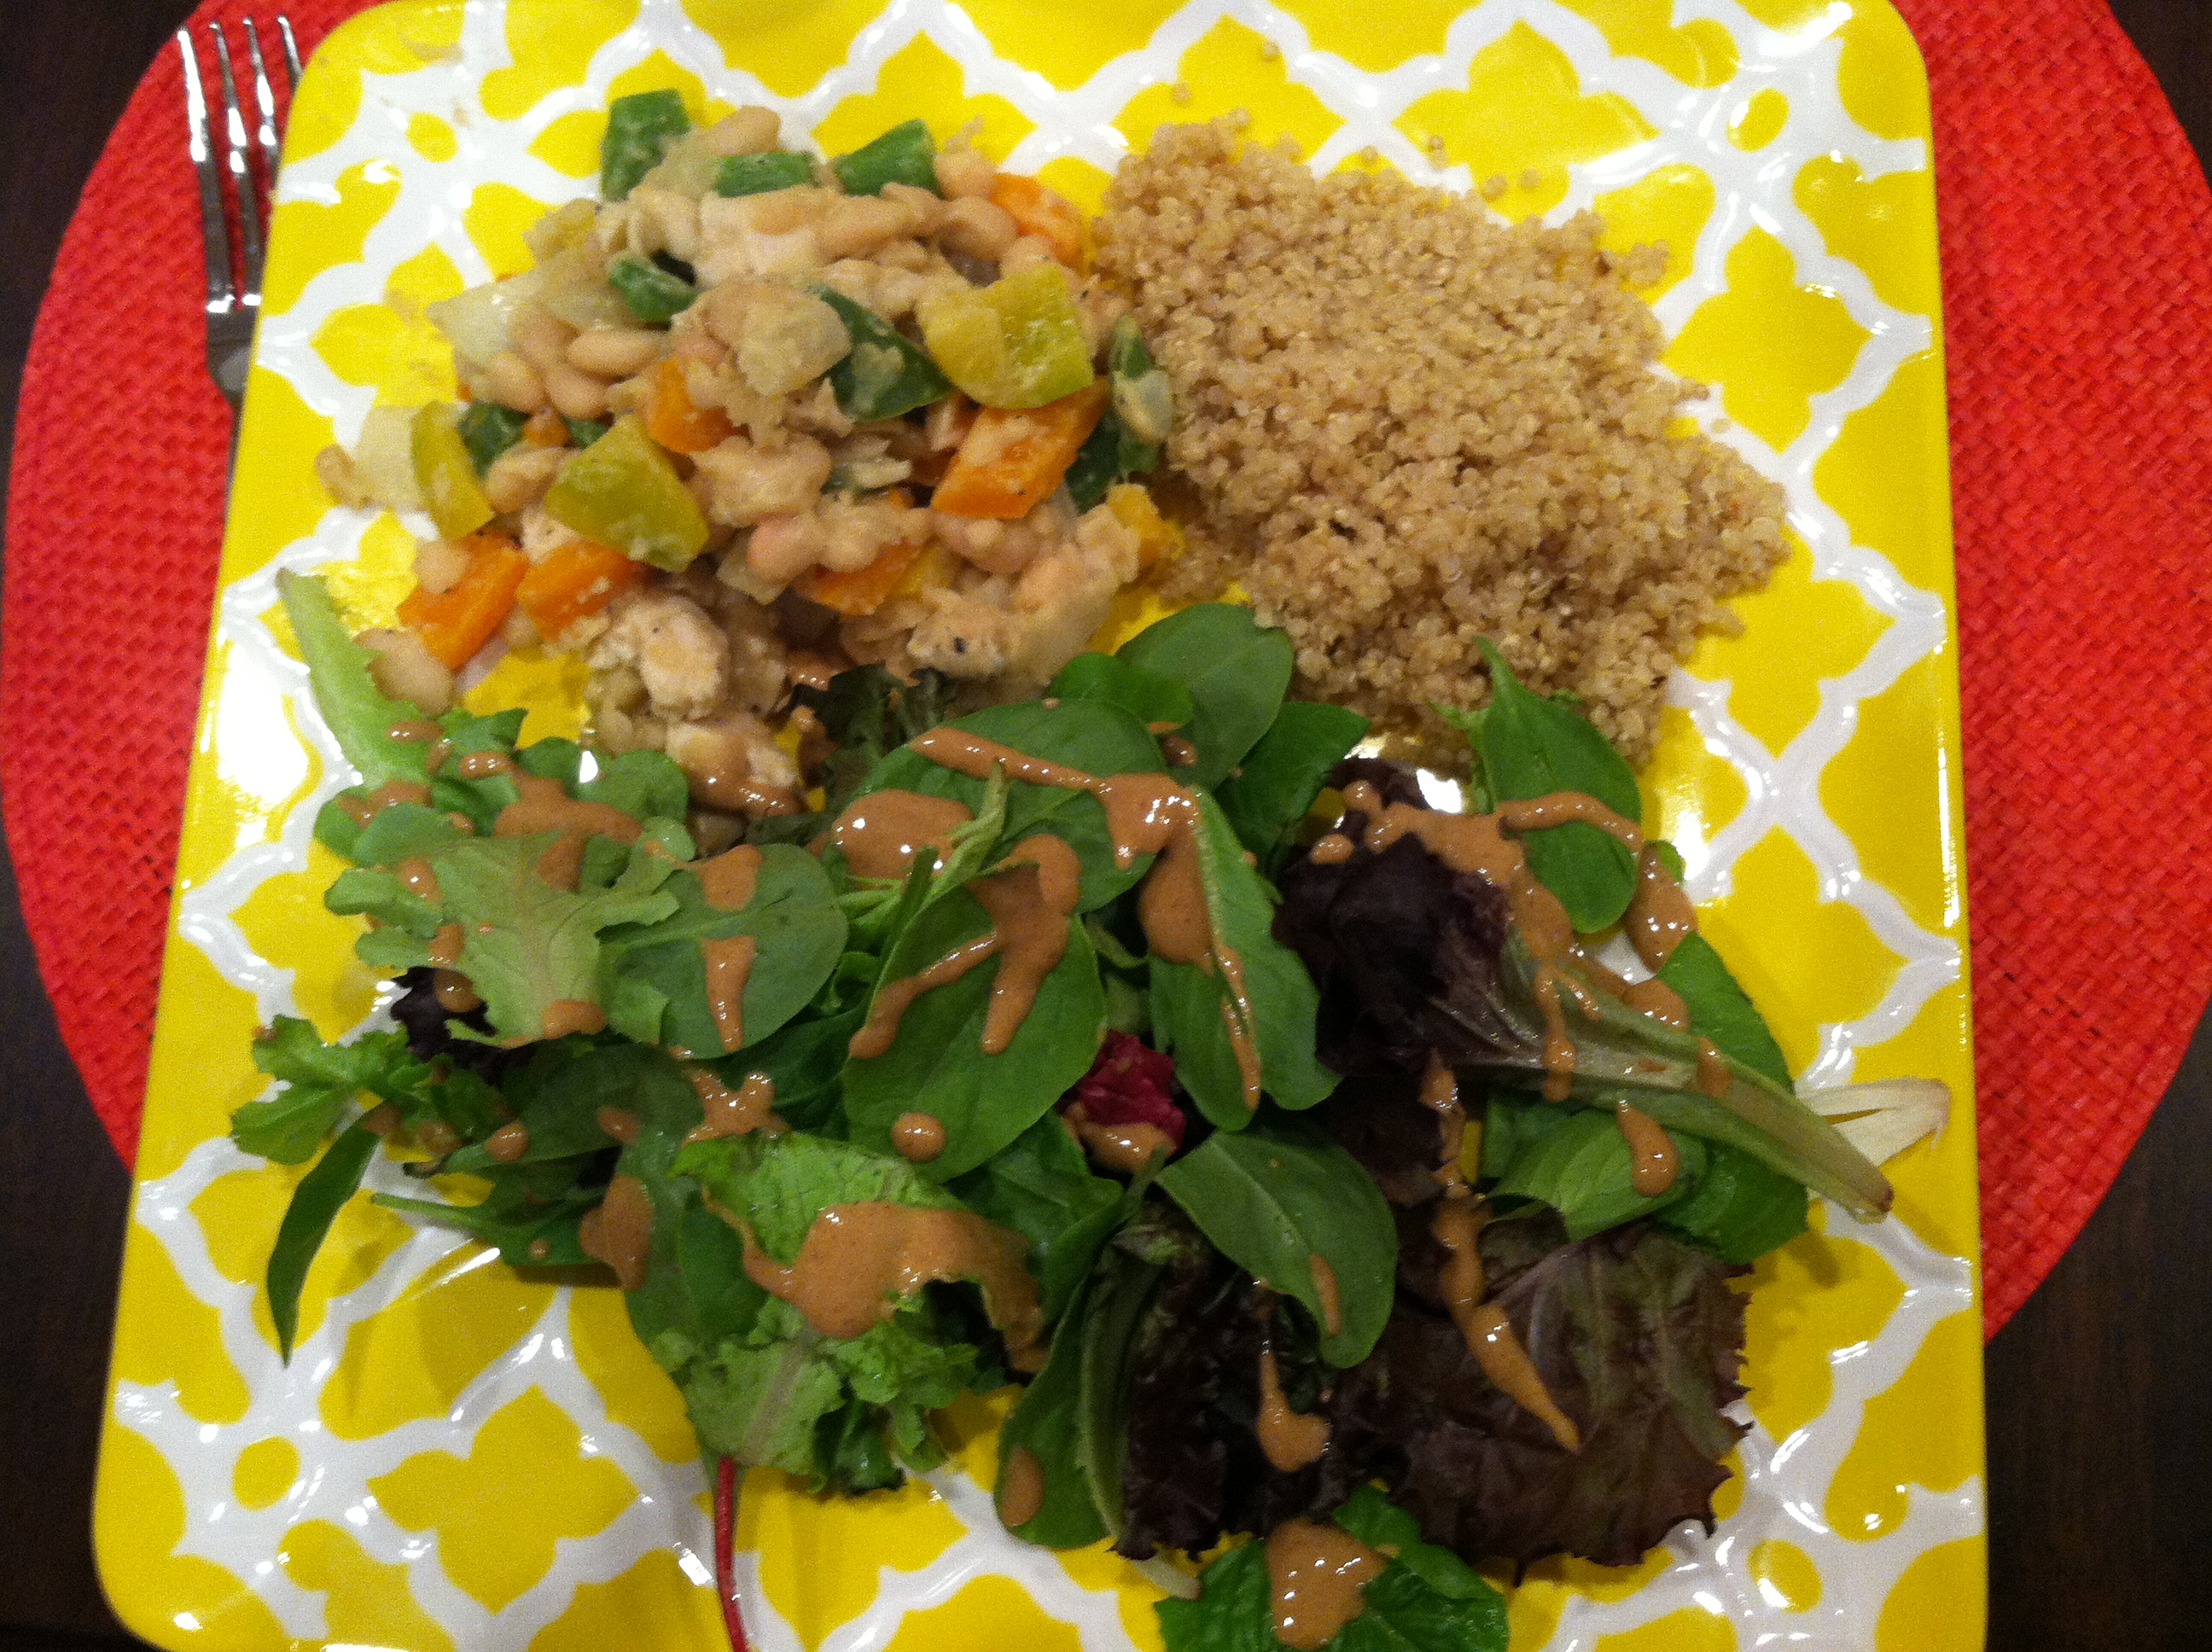
When your veggies seem about done add your pre-cooked protein.  I chose shrimp because I’m a major seafood lover and always have frozen shrimp on hand.

Image

Give it a final stir, remove from the heat, and it’s all ready to serve! Make sure to top off your bowl of stir fry with a little more sweet chili sauce…it’s so delicious and the flavor isn’t terribly strong in the veggies after they’re cooked.

This easy, low-calorie dish takes less than 30 minutes to prepare and fulfills any craving for comfort food in the dead of winter.  

Serve over brown rice and enjoy!

Image

Question

  • What’s your favorite comfort food when it gets cold outside?

Not Your Grandma’s Banana Bread (recipe)

Banana bread is one of the most classic comfort foods. With a short ingredient list that often includes flour, sugar, eggs, bananas, and oil, it’s easy to put together with the staples you most likely already have in your kitchen.  It’s basically the Channing Tatum of dessert breads–you’re always in the mood for it, it makes your mouth water, and the smell of it is intoxicating (okay so I’ve never actually smelled CT but I bet you it’d be intoxicating).

This banana bread, however, isn’t your typical recipe. One of the things that helps me stay on track with eating a relatively healthy diet is upping the protein whenever possible. I don’t think you should ever restrict foods, but instead make foods as nutrient-dense as possible. That way, you’ll fill up faster and stay satisfied longer.  That’s why I changed around some of the ingredients of this old standby and made a banana bread with a protein-packed punch.  I adapted the recipe from this girl, and it came out just as delicious as expected, just with multiplied staying power.

So since it’s that time of the year for comfort food, enjoy!

Not Your Grandma’s Banana Bread

Image

Ingredients

  • 1 cup flour
  • 1/2 cup almond meal
  • 1/2 tsp baking soda
  • 1 tsp baking powder
  • 1/2 tsp salt
  • 1 tsp cinnamon
  • 1/2 cup sugar
  • 2 mashed bananas (very, very ripe)
  • 1 tbsp vanilla
  • 6oz container of banana Chobani yogurt
  • 2 tbsp coconut oil
  • 1 egg
  • 1 egg white
  • 1 cup walnuts

First, preheat your oven to 350.  Prepare your pan by lining a 9-inch loaf pan with foil and giving it a spray of Pam. This helps with a quick cleanup and also ensures that your bread comes out nicely when you slice it.

Image

Next, mix all your dry ingredients in a large bowl (flour, almond meal, baking soda, baking powder, salt, sugar, and cinnamon).

In a separate medium bowl, slowly mix together your wet ingredients (egg, egg white, bananas, yogurt, vanilla, and coconut oil).

Image

Once you have both bowls set aside, slowly add the wet ingredients to the dry ones, mixing just until incorporated. Over-mixed batter leads to dense bread (and this bread will already be pretty dense thanks to the almond meal substituting for some of the flour).

Once you have your batter mixed together, add a cup of walnuts to the mix, because, why not?

Pour your batter in your prepared baking pan and put in the oven for 45-50 minutes, or until a toothpick inserted in the center comes out clean.

Ta-da!

Image

By adding the Greek yogurt and almond meal you’ve automatically added 28 grams of protein to your bread. It doesn’t get much easier than that!

Question:

  • Do you often “healthify” your baked goods, or are you an all-or-nothing person?


stuffed shells (recipe)

Stuffed shells is one of those recipes that comes out looking like it took tons of time and attention, when in reality it’s so simple to make.  Even better, you can store it in the fridge until you’re ready to pop it in the oven.  Plus, you have a lot of freedom with what you want to put in your shells–personally I’m just a cheesy gal so I like to stuff them with mozzarella and Parmesan, plus some spinach. You can’t even taste the greens but they add so much nutrition to an otherwise indulgent meal.

Now that winter’s right around the corner, bookmark this for your next night in.

First, start off with your ingredients:

 Image

Ingredients

  • 1 box of jumbo pasta shells OR manicotti (I find shells to be a lot easier to work with)
  • 1.5 tbsp olive oil
  • 4 cloves garlic, minced
  • 4 (packed) cups fresh spinach leaves (approximately 1/2 a standard bag that you find at the grocery store)
  • 15 oz container of ricotta cheese
  • 1 cup shredded part-skim mozzarella cheese
  • 1/2 cup Parmesan cheese
  • 1 egg
  • 1 tbsp milk (optional)
  • 2 cups marinara sauce (I always end up using more because I love lots of sauce)
  • pinch of salt/pepper

Before you start the filling, cook the shells/manicotti according to directions on the package.  It’s always easier to stuff shells if they’re cooled off when you start to work with them.  Set aside. Preheat your oven to 375.

First, start by mincing your garlic.

Image

Once your garlic is ready, heat up the olive oil in a medium pan. Wait for the oil to be hot before adding the garlic. Stir the garlic around in the pan for about 30 seconds.  Add the spinach and let it cook down in the pan, about 1 minute.

Image

Set aside the garlic/spinach mixture.

In a medium bowl mix together your three cheeses.  Add a pinch of salt/pepper to the bowl and help it all come together by adding your egg and 1 tbsp milk (optional–only if it seems too thick).

Image

Once your egg is stirred in (30 seconds to 1 minute), add the spinach to the cheese until it’s all combined.  Now your filling for the shells is complete!

Image

Next, pour 1 cup of marinara sauce along the bottom of a 13×9 glass pan.

Take your shells and carefully fill each one with the cheese/spinach mix. There’s no real method for this except that if you use too much filling, you’ll run out of shells pretty fast. Fill the shells so that they still close, but just barely.

Place each shell in the pan in lines so the shells don’t turn over while cooking. Cover with the rest of your marinara sauce (1 cup or more, your preference).  Cover with aluminum foil and place in the oven for 25 minutes.

After 25 minutes, take off the aluminum foil and sprinkle your shells with more cheese (Parmesan, mozzarella, or both!) Place back in the oven for 5-10 minutes–just don’t let the cheese burn!

Ta-da!

Image

It’s a delicious dinner that all comes together in 30 minutes! You can’t beat that.

Enjoy!

Question:

  • What’s your favorite cold weather meal?

roasted pumpkin seeds (recipe)

Happy Halloween!!

Image

How talented is my dad? Such perfect pumpkins!

It’s officially the start of the busy holiday season! Thanksgiving is going to be here before we know it and then Christmas is right around the corner.  It’s the same thing craziness every year, but these next few months is my favorite time of the year.  I love the anticipation of the holiday season (and the fact that holidays are pretty much centered around great food)

Today I’m going to share with you one of my favorite ways to use those pesky pumpkin guts! It’s a messy job, but the finished product is a perfect crunchy snack.

Roasted Pumpkin Seeds (adapted from Oh She Glows)

First, start out with a big ol’ pumpkin. The bigger the better. I used the seeds from both the pumpkins in the picture above and the smaller one actually had a bigger percentage of seeds, but I wasn’t in the mood to seed 10 small frys. Your best bet is to grab a huge pumpkin and hope for the best!

Image

Grab a very sharp knife and carefully cut off the top. After that it’s as simple as grabbing all the guts out and putting it all into a giant bowl.  Now comes the fun part…the sorting! Do your best to separate the seeds from the rest of the goop, and you’ll eventually be left with this:

Image

When you’re left with just the seeds, rinse them VERY well until they’re almost totally clean of any leftover pumpkin. Lay on a paper towel to dry.

Once you have the seeds all ready to go, fill a medium pot with water, add a few shakes of salt, and pour in the seeds.

ImageBring the water to a boil.  Once it’s bubbling, reduce the heat to medium-low and simmer uncovered for 10 minutes. Drain.

Lay the seeds once again on a paper towel and dab them until they’re dry.

Image

Once the seeds are dry, lay them on a cookie sheet so they are all spread out in one layer. A little overlapping is fine.

Drizzle the seeds with olive oil.  Rub the oil into the seeds and stir them around so it gets evenly distributed.  Finally, sprinkle with sea salt (or table salt, which I think actually works better for this.  The sea salt didn’t stick very well for my batch). Remember, don’t add too much salt–just a few shakes at first.  You can always add more as you taste test, but nothing’s worse than realizing your snack is waaay too salty and you can’t turn back.

ImagePut the seeds in a 325 degree oven for 20 minutes, taking out halfway through to stir.  You’ll probably hear some popping while it’s in the oven–that’s nothing to worry about. When you take them out taste test a few and see if you need to add more salt.

ImageI’ve heard of people adding lots of different spices to their pumpkin seeds: garlic powder, Cajun seasoning, cinnamon and sugar, etc. The best part of pumpkin seeds is they are so versatile so you can make them into whatever kind of tasty snack you choose!

Pour into a cute little dish and serve alongside some candy corn for a treat. This is a great snack to have on hand while you’re handing out candy to all the little ghouls and goblins coming by.  It’s also a really healthy alternative to constantly reaching into the candy bowl.  Even if you alternate candy-seeds-candy-seeds you’re still upping your omega-3 fats, antioxidants and vitamin E and lowering your intake of high fructose corn syrup, Red 3, and Yellow 5. Definitely not a bad thing!

ImageHave a great holiday!

Question:

  • Anyone dressing up today for Halloween?

Shrimp Creole (recipe)

I know I’m a day late for a “Meatless Monday” post, but it’s never a bad day to share a recipe, right?

Image

If you’re new to the game, here are some reasons to go Meatless on Mondays:

  • Limit cancer risk: diets high in fruit/veggie consumption may reduce cancer risk. Red and processed meat consumption are linked to colon cancer.
  • Reduce heart disease: recent data from a Harvard University study found that replacing saturated fat-rich foods (meat and full fat dairy) with foods that are rich in polyunsaturated fat (vegetable oils, nuts and seeds) reduces the risk of heart disease by 19%.
  • Fight diabetes: research suggests that higher consumption of red and processed meat increases the risk of type 2 diabetes.
  • Reduce your carbon footprint: The United Nations’ Food and Agriculture Organization estimates the meat industry generates nearly one-fifth of the man-made greenhouse gas emissions that are accelerating climate change worldwide (far more than transportation).  Reducing in meat consumption once a week can help slow this trend.

Sure, statistics and studies change over the years.  But no matter what you think about meat, you can’t argue that focusing on fruits/veggies/legumes for ONE day a week is great for your body.

This recipe, while it does contain shrimp, is a great recipe that is focused around veggies. Many people debate whether or not fish is “meat” and are outraged that some choose to include it even when participating in Meatless Mondays.   I say do what you want. I personally don’t count fish as meat.  If you’ve been reading this blog for a long time, you know that I never eat red meat (never have) but do eat white meat, fish, and eggs, so this day isn’t a huge challenge for me.  I can imagine, however, that if you’re a big burger, steak, or fried chicken eater, having grilled shrimp or wild salmon on Mondays would be a huge change, and your arteries would thank you greatly.

So if you’re looking for a meal that is simple to prepare, easy to make (hello, crock pot), and gives you a break from your meat-eating ways, I definitely suggest shrimp creole.  And if you think shrimp is a deal-breaker when going meatless, leave it out! There is so much flavor in the creole as it is that I’m sure it’d be great alone.

All in all, let’s make these guys happy once a week:

Image

Shrimp Creole

  • 1.5 cups chopped onions
  • 3/4 cup chopped celery
  • 1 glove garlic, minced
  • 3/4 cup chopped green pepper
  • 1  28 oz can crushed tomatoes
  • 2  8 oz  cans tomato sauce (or 1  15 oz can)
  • 1 tsp salt
  • 1 tsp sugar
  • 1/4 tsp pepper
  • 1 tsp paprika
  • 1 bay leaf
  • 4 drops tabasco sauce (or more if you like it spicy like I do!)
  • 1 lb cooked shrimp, shelled and deveined (If frozen, thaw and rinse)

Combine all ingredients except shrimp in crock pot and stir.

Cover and cook on Low 7-9 hours (High 3-4 hours)

Image

During the last 15 minutes, add your shrimp until they are warm. Don’t leave them in there too long or they’ll turn into little hockey pucks, since they’re already cooked.

(If you use shrimp that is not already cooked, add it in the last hour on High, and make sure they are pink before you stop cooking the creole).

Serve over brown rice and enjoy!

Image

ginger lemonade (recipe)

The first thing I felt this morning when I woke up was …… sniffles

Call it allergies, call it the start of the plague, but I know something is up.

I feel great otherwise so I know that the best thing to do is take all preventative measures to stop this thing dead in its tracks.  This usually includes a lot of water-drinking, antioxidant-eating, and laying horizontal for as long as possible.  Since I have two jobs and no time to test out the “Don’t bother me I’m laying here to prevent myself from getting sick” theory, I’m stuck with the home remedy approach.

I’ve often heard that ginger helps a laundry list of illnesses, including upset stomach, muscle pain, and congestion.  It’s no coincidence that whenever I used to feel under the weather at school I used to go to the coffee shop where I worked and pick up a “Ginger Dragon”, a steamy drink that soothed my sickness and my soul.

Now that I’m home and sick season is approaching, I figured I’d try to make my own concoction to keep in the fridge for days like today when I want to drink lots of fluids and feel all the great benefits of ginger.

It actually came out great! It might seem like a hard recipe because, really, who buys ginger root?  But it’s very simple and I’m already feeling better, so bookmark this if you feel like you’re coming down with something.

Image

Ginger Lemonade

  • 1 large ginger root (about the size of a standard book)
  • 3 lemons
  • 1/2 cup honey
  • 6 cups of water
  • 1 gallon pitcher

First, boil your water in either a tea kettle or on the stove.  While this is heating up, rinse your ginger root thoroughly and then simply chop it up into pieces (no method here, just in 1 inch pieces or so, nothing that won’t be stopped by a colander).

Place the pieces of chopped ginger into a glass bowl (make sure the glass is durable and room temperature so it won’t shatter!) and pour the hot water over the ginger.

Let the ginger steep in the water for 30 minutes.  Drain the mixture through a colander to get all the ginger pieces out.  You should now be left with ginger-infused water.

The water should still be warm at this point.  Squeeze the juice of all three lemons into the water and then slowly add the honey, making sure to stir so it melts into the water.  You can always microwave the water again if you need to in order to help the honey melt.

Once the ginger water, lemon juice, and honey are all mixed together, pour it in a one gallon pitcher.  It won’t be full, so just add cold water until the pitcher is filled up.  Stir the whole thing and then store it in the fridge.  Remember, it’s all about what your taste preference is.  Mine turned out just the way I like it, but you might want to add more honey or dilute it with even more water. It’s totally up to you!

I’m drinking mine chilled now but it’s also great as a hot drink, especially when you have a full-blown cold. Something about the mixture of honey, lemon, and ginger is comforting and cleansing. 

Enjoy!

Question:

  • What’s your favorite way to ward off sickness?

doctors and smoothies (recipe)

what do these two things have in common? nothing, except both made appearances in my life yesterday!

After my workout yesterday I had to fast because I knew I’d be getting blood work done at the doctor. Pure misery, I tell you.  My body does not do well not eating for 5+ hours. I am the epitome of “hangry” (just ask Zman–he’s often the victim of my hangry wrath).

However, I knew if I wanted to get to the bottom of why I was feeling so crappy, I had to go to the doctor.

ImageSelfies at the doctor so, yeah, that’s a new low… 🙂

Image

After a series of blood tests, my yearly physical, and getting a flu shot (yay killing three birds with one stone) I was ready to eat the cotton balls sitting on my doctor’s desk.  However, self-control and societal norms kept me from doing this and I was out of there pretty fast.

Funny story…when I was younger I used to HATE getting my blood taken. I’m talking cry-in-the-chair and scream-for-my-mom type hate. Nowadays I’m the weirdo who likes to watch the whole time! Call me crazy but I think the body is so cool and I love watching medical stuff like that. The nurse even said I may have missed my calling 😉 Eh I think there’s a big difference between watching my skin get pricked and being able to handle things like other people’s bodily fluids and open wounds. Just saying.

The diagnosis? Migraine.

Image

I’ve always thought migraines were fake. Is that mean? I don’t know but I’ve always had people in class or at work complain of a “migraine” and ask to go home or not perform work that they are supposed to do.  Luckily I have medication now that has helped tremendously and I feel so much better already after just one day! I promise I’ll never be “that person” who uses migraines as an excuse to get out of work, but I will definitely think twice before judging someone who complains of one. These are no joke! 

I sped out of the doctor’s office and went straight to my favorite sandwich shop just a few miles down the road.

Image

“Vegetarian Special”: 6 grain bread, swiss cheese, light herb mayo, lettuce, sprouts, tomato and red onion.

I ate that sandwich along with a bowl of cheerios in a total of about 5 minutes. Then I became human again and all was right in the world.

Image

Anyway, while the medicine helped, it killed my appetite for the rest of the day so I stuck with smoothies for the remainder of my meals.  A lack of produce at my house called for some creativity and I came up with a great new smoothie recipe!

Orange Mango Smoothie

  • 1 cup orange juice
  • 1 6oz container of plain greek yogurt, sweetened with truvia (sweetener is optional)
  • 1-1.5 cup(s) frozen mango chunks
  • Badass glass to drink from

The result?

Image

I felt like I was on a tropical island.

Happy Thursday! Have a great afternoon 🙂

Questions:

  • Have you ever had a migraine?
  • What’s your favorite kind of smoothie? I’d love some inspiration!


Chicken and Goat Cheese with Quinoa (recipe)

Today I have a great recipe to share with you!

While I was in Washington D.C. my friends and I went out to eat every opportunity we had.  Eventually our stomachs and wallets were dying for a homemade meal! Thanks to my good friend Mel, always the creative cook, we came up with a really easy and healthy dish to prepare for a family-style dinner on Saturday night.

Image

Before I post this, I just have to say: I’m not the biggest fan of quinoa. To me, it needs A LOT of work to be enjoyable. Spices are imperative when creating a dish involving quinoa, because alone it doesn’t taste like much.  Well this recipe opened my eyes to the beauty of goat cheese, and all that it can do for a recipe! I had never had goat cheese before!  It added just the right amount of creaminess and decadence to this dish.

Without further ado, a new recipe for you to try!

Image

Chicken and Goat Cheese Quinoa

Ingredients

  • 3 grilled chicken breasts (precooked)
  • 16 oz bag of quinoa
  • 4 assorted bell peppers (we used yellow, orange, and green)
  • 1 large yellow onion
  • 1/2 of a 5oz. log of goat cheese–more or less depending on  your preference
  • 2 15oz. cans TJ’s Organic Great Northern Beans (or any other kind of white bean)
  • Cumin (start with 3 tbls. and add according to taste/preference)

Start by cooking the quinoa according to the instructions on the bag. Once it is cooked season it with a tablespoon of cumin and a generous pinch of salt and pepper. Set aside.

Image

Once the quinoa is cooking, chop your peppers and onions.  You want these pieces to be bite-sized but not too small.

Image


Sautee the chopped peppers and onions in olive oil until cooked, but still crispy.  Season with salt, pepper, and a tablespoon of the cumin.

Once the peppers and onions are cooked, add the chicken breasts (chopped). Finally, stir in the goat cheese! Mix only until the goat cheese is combined throughout.  Add your third tablespoon of cumin, along with a few pinches of salt and pepper.

Now that everything is combined, it’s important to keep tasting until the amount of cumin is just right.  It’s a very important flavor that really adds a lot to the dish, so make sure you use enough.  You can always add more, but you can never take some back!

Serve with the quinoa and a simple side salad.  I made one using my dijon mustard dressing and leafy greens.

ImageI don’t know if it was the family atmosphere or the dish itself, but I enjoyed this meal more than I’ve enjoyed one in a long time. We ate this dinner, drank margaritas (not the best pairing haha), and talked about everything from music, politics, and current events for hours. I love being with people who appreciate food as much as I do. Food isn’t just about the action of eating, it’s about the community it creates and the art it can exhibit, if you just give your meals a little time and attention.

On a side note, ever since I stopped “dieting” and started eating mostly whole foods, I’ve noticed that I have a much deeper appreciation for food. When you eat things that are natural such as fruits, veggies, lean meats, and nuts there aren’t any restrictions! That was what always caused me to fail and be stressed out all the time with food in the past. There were so many opportunities “to fail”.  When you view your diet as an opportunity to eat all the whole foods that you want, you start seeing all the wonderful things that you CAN eat, not all the things that are forbidden.

I hope you enjoy this recipe as much as I did!

Question: do you know anyone who sees eating as a “nuisance”? A man on the radio the other day said that eating often “gets in the way” of his day and it annoys him. How is that possible?!

pressing the reset button

I always feel pretty out of sorts health-wise whenever I come back from time spent on vacation. Since the past month I’ve been out of town every weekend, indulging and skipping workouts, I knew this Monday was a good time for me to press the reset button.

The whole day was a jumble since I got home from my flight at 9am (after the airline lost my bag and I had to fill out all that fun paperwork) and had to jump directly into work. My eats yesterday were healthy and wholesome, however, which I was especially proud of myself for considering when I’m tired, all I want is easy-cheesy carbs and sugar.

The highlight yesterday was dinner! All the stars aligned and I had every single ingredient for a Nicoise Salad!

Image

For those of you who don’t know, a Nicoise salad is NOT your typical rabbit food.  It has some serious staying power, thanks to tons of protein in its variety of ingredients!  When I studied abroad in Paris this was one of my favorite things to order (when I wasn’t diving head first into a croque monsieur).

Here’s a quick recipe for those who don’t know the ingredients:

Image

Nicoise Salad

  • Leafy greens
  • One small can of chunk light tuna, drained (4 oz or so)
  • 1 hard boiled egg (chopped and sprinkled with salt and pepper)
  • Green beans (just a handful or so…steamed, roasted, whatever! but they should be served cold on the salad)
  • Chopped tomato
  • Dijon mustard dressing*

Dijon mustard dressing

  • Dijon mustard or something similar (this time I used the garlic mustard aioli from TJs)
  • Balsamic vinegar
  • Olive oil

Whisk the mustard and vinegar together first until very well combined. Then add the olive oil and whisk together for a few minutes.  Proportions are hard to say exactly for this, but I usually start with about 2 tbl of mustard, add in 1 tbls of vinegar, and then add olive oil to taste.  You really have to try it for yourself. You really can’t mess this up as long as you whisk the vinegar and mustard first and then add the oil slowly afterwards.

This salad comes together so beautifully, and if you have all the ingredients on hand (which, let’s be honest, how often does that happen?) it is so easy to make.  Even if you normally don’t have this stuff at home, make it a point to try this salad sometime.  It’s delicious and stays with you for hours, thanks to the protein from the tuna and egg.

An hour later I had some dessert: healthy but still indulgent

Image

Plain greek yogurt mixed with truvia, vanilla, unsweetened cocoa powder, and semisweet chocolate chips. Yum!

This morning I got down to business at bootcamp.

Image

Tough workout! Especially because I decided to wear all black and we spent most of the time running. All in all, including the warmup run-through of this WOD and the core work at the end, this was only a 30 minute workout.  However, I worked my butt off and my muscles feel like they’re still twitching! Crazy.

ImageImage

Feeling exhausted but strong and powerful at the same time–the BEST kind of workout.

I came home and took two L-glutamine supplements hoping that will help my soreness when I head back to bootcamp tomorrow.  Breakfast before work was simple:

ImageKashi GoLean + flax seeds + banana + almond milk. Quick and easy, because I had a conference call for work to get on!

I’m feeling really motivated for a full week of healthy eating and challenging workouts! Maybe it’s the changing of the seasons but it always gives me that extra boost of motivation.

Question: when during the year are you most motivated to eat right and exercise? Is it only when bikini season is right around the corner?

Jalapeno popper diplicious (recipe)

I’ve always seen “jalapeno poppers” listed as appetizers at restaurants, but they never struck me as appealing.  I usually breeze right past them and look for the nearest spinach-artichoke dip or fried pickles.  Call it “wisdom with age”, but I used to think jalapenos were gross just because of how they looked.  The same has happened to me with onions and coffee as I’ve grown up. Two foods that I couldn’t stand growing up are daily staples in my diet today (you can get this in writing, though: I will NEVER like mushrooms).

One day at the restaurant one of the chefs put jalapenos in my grilled chicken sandwich on accident, and being the “avoid conflict at all costs” type of girl that I am, I didn’t say anything.  However, after the first bite I realized: jalapenos are AWESOME! They gave the sandwich a spicy kick that took it to a whole other level.

Later that night I stumbled (ironically) upon a recipe for jalapeno dip.  I took that as a sign from above and decided to tweak it and bring it to movie night with my friends a few weeks ago.  It was a hit!

Image

So if you’ve never tried jalapenos before or just love jalapeno poppers and want to try out an easy alternative, this is the recipe for you. The abundance of cream cheese and greek yogurt cools the jalapenos down and together they strike a perfect balance of hot and creamy.

Jalapeno Popper Diplicious

  • 2 8oz packages of cream cheese
  • 3/4 cup light mayo
  • 1/4 cup plain greek yogurt
  • 2/3 cup shredded cheddar cheese
  • 1 1/2 cup shredded parmesan cheese
  • 1 4oz can of green chiles, drained
  • 5 jalapenos diced (less if you don’t want it as spicy)
  • 3/4 cup panko bread crumbs

Set oven to 375 — mix all ingredients together and top with the bread crumbs.  Bake for 25 minutes and serve immediately.

Image

**Make sure to serve it right away, because once it starts to cool down it gets hard to scoop up with chips

**Serve with potato chips, pita chips, crackers, etc.  We had ours with pita but I think it’d be better with normal potato chips or crackers because of the saltiness.

**PS I didn’t say this was going to be healthy 😉

Enjoy!